How to Make Facebook Business Page
Terrific! So where should you begin? And exists an easy blueprint to follow?
From developing our Facebook Service page to publishing several hundred times over the previous couple of years, we have actually explored a lot with different Facebook marketing ideas and have taken pleasure in figuring out the finest method to create and handle our Facebook page here at Buffer. I 'd like to share with you how the procedure has worked so far from start previously!
How To Make Facebook Business Page
Since things continue to change frequently with Facebook and its algorithm, consider this A to Z guide as a great jumping off point for creating a Facebook service page and growing your audience. Start here, test what works for your individual service and brand, and make modifications as you discover.
The best ways to Create a Facebook Company Page in 5 Simple Actions
Action 1: Complete your basic service information.
Open the following URL to produce a service page on Facebook:.
https://www.facebook.com/pages/create.php.
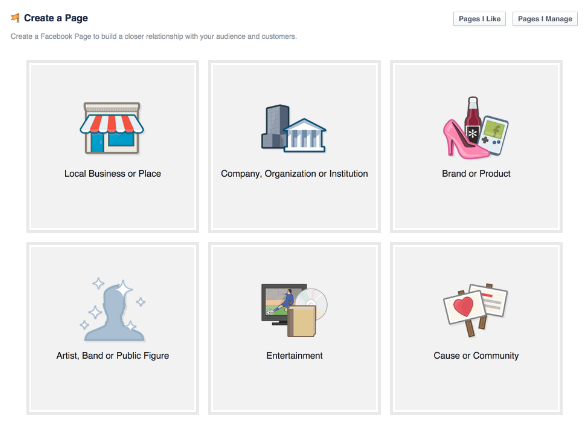
Once there, you'll pick one of the following six classifications for your page:.
- Local service or location.
- Company, organization, or organization.
- Brand or item.
- Artist, band, or public figure.
- Home entertainment.
- Cause or community.
Keep in mind that you can change the classification and name later if needed.
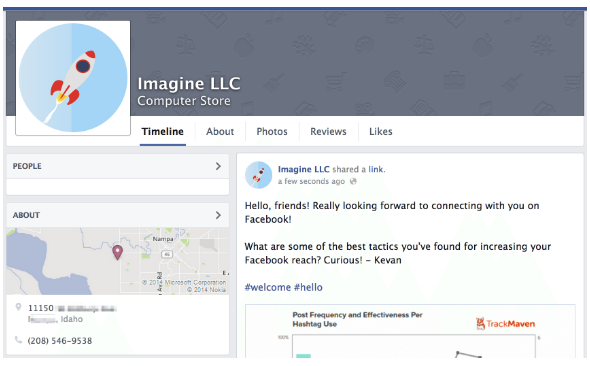
Also, at this phase, it may be helpful to know that a physical address figures prominently in the setup of a regional service or location, and the actual Facebook page will appear differently also.
Here's the search for a regional company:.
Here's the search for a company or brand name:.
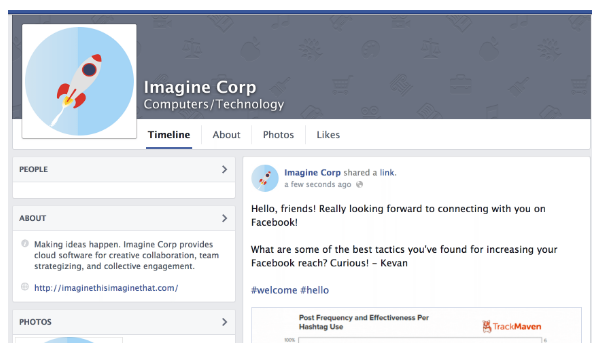
It's something to think about when selecting a classification.
Following the category choice, the next setup screen will request a detailed sentence or two about your page, a URL, a Facebook page URL, and a profile photo. If you have actually selected a local business, you'll also have the capability to choose category tags to more define what your shop offers.
About your page-- You get 155 characters to explain your page. This description appears prominently near the top of your Facebook page on both desktop and mobile. Be as descriptive and useful as possible.
URL-- The web address for your store, company, or brand.
Facebook URL/ username-- You may have the choice to choose a customized vanity URL for your page, i.e. facebook.com/yourbrandname.
( Facebook will ask that you reach 25 fans first before you can open a custom Facebook URL).
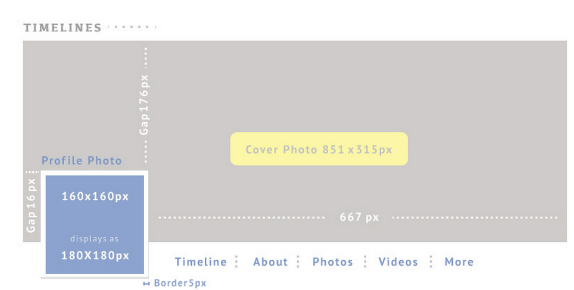
Profile picture-- Upload a primary profile picture/icon for your page. This photo will appear as your icon each time you talk about a post or publish in a news feed. Square dimensions are best. Facebook will force rectangular pictures to be cropped to squares.
Profile images ought to be at least 180 pixels large by 180 pixels high. Here is a complete list of the sizes that Facebook utilizes for your profile image in numerous places around the site:.
- The primary profile image on your page-- 160 x 160.
- In a news feed-- 100 x 100.
- In your timeline-- 86 x 86.
- Next to comments-- 43 x 43.
The final two actions in the setup procedure consist of adding your page to your primary Facebook menu (so you can access it rapidly and easy each time you visit) and establishing a Facebook advertisement to promote your brand-new page. These choices can be avoided in the meantime.
Action 2: Create an awesome cover image in a breeze (no designer required!).
By this point, your page is live for all the world to go to. Let's see if we can make it look even snazzier.
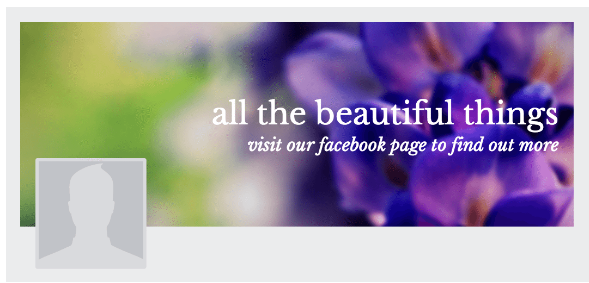
First thing, include a cover photo. The cover photo appears throughout the top of your page and is a terrific opportunity to provide a visual component that supports your branding, draws attention, or elicits emotion from your visitors.
A note on ideal Facebook cover photo size and dimensions:.
Facebook cover photos appear at 851 pixels wide and 315 pixels high on desktop, however, Facebook crops out a few of each cover picture on mobile phones. It particularly removes out 144 pixels off the right and left sides of the image.
Therefore, Facebook cover picture measurements are 851 x 315px, but just the center 563 x 315px part of the photo appears on mobile.
You can definitely hire a designer to make you something amazing, or you can go the Do It Yourself path. Many photo modifying apps like Photo Monkey or BeFunky can assist with creating images of simply the best dimensions. If you're a Photoshop user, we've developed a number of Facebook cover image templates that may be handy. Canva is another incredibly valuable tool for Facebook cover photos as it includes a number of premade templates that look excellent right out of package.
Here's an example of a Canva template you might select. You can upload your own image to use as the background, and you can edit the text to say whatever you 'd like. If you're trying to find top quality image alternatives, we have actually put together a list of our favorite sources totally free social networks images.
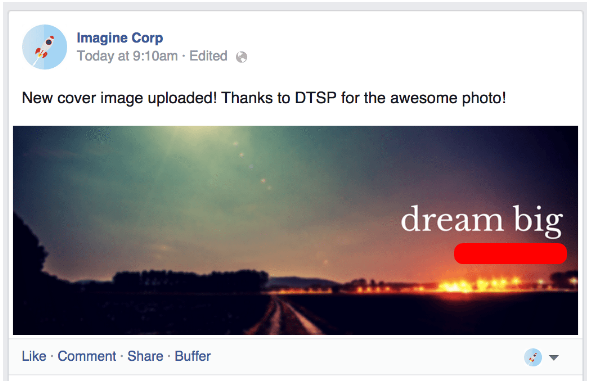
When you have actually developed your cover image, upload it to your page by clicking on the "Include a Cover" button.

If you take place to submit an image that isn't really rather the specific measurements of the Facebook cover, you'll have a possibility to move and modify the image to fit the offered window. When you enjoy with the last look, you can click "Save Changes," and you'll be set!

Here's a professional tip: When you publish a cover picture to your page, the image is added as an upgrade to your timeline. If you edit the description of the image, you can include a message to the upgrade. Click on the picture to open the picture audience, and you'll observe a link that says "Add a description.".
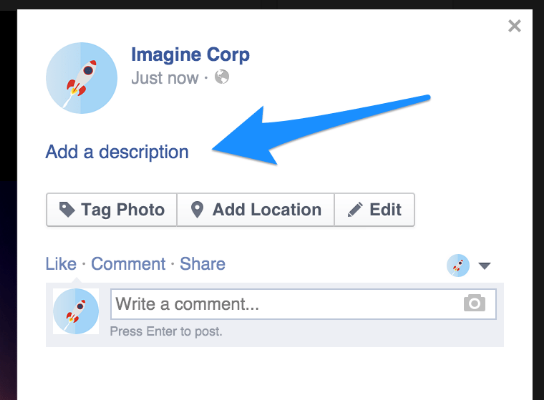
You can include description, tags, place, and date to your picture. When you have actually ended up, the upgrade to your timeline will be changed to show your edits.
Action 3: Fill out your profile completely.
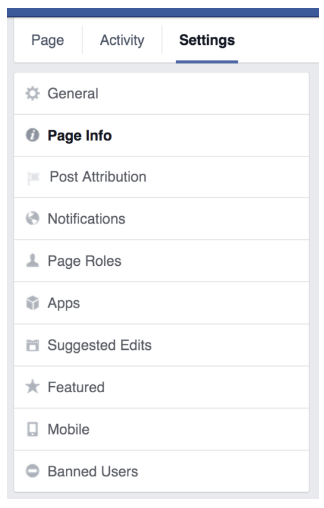
Next, you can fill out your profile even more by including info to your Page Information area. To access this area, click Settings in the top menu bar on your page, then click Page Details.
Your name and classification will be completed already. A few of the most valuable littles details to include next might be:.
Start Details-- You can select when your company or item was founded, developed, started, or introduced. This information will appear on the history timeline to the right of your page's feed and as an upgrade at the really bottom of your main feed.
Address-- Enter this if you want individuals to be able to check in through Facebook when they're near your place.
Long description & Objective-- Include additional information that discuss your service or brand name even further. This is a great method to exceed the 155 character description that appears on the main page.
Telephone number/ Email address-- Include extra contact info.
All these details will appear on the About tab of your Facebook page.

Action 4: Add collaborators to your page.
If you prepare on sharing your Facebook marketing duties with a group, you'll want to give access for numerous folks and numerous functions.
Here are the roles that you can pick from:.
Admin-- Total and overall access to everything (you are an admin by default).
Editor-- Can modify the Page, send messages and post as the Page, create Facebook advertisements, see which admin developed a post or comment, and view insights.
Mediator-- Can react to and delete discuss the Page, send out messages as the Page, see which admin produced a post or remark, create ads, and view insights.
Advertiser-- Can see which admin created a post or comment, develop ads and view insights.
Analyst-- Can see which admin produced a post or remark and view insights.
To add collaborators, go to your page settings and the "Page Roles" section. You can type in the name of any Facebook pal or individual who has liked your page. Alternately, you can enter an e-mail address related to a Facebook account.
Step 5: Publish your very first post.
Add material to your page by releasing a post-- a status upgrade, a link, an image, a video, an occasion, or a turning point. New, fresh material on your page will make it look all the more luring as soon as new visitors come by to check it out.
Remember that visual content does exceedingly well which Facebook is now ranking Live Video higher in people's news feeds.
Here's an informing graphic from a BuzzSumo study revealing how Facebook posts with images get 2.3 x more engagement than those without photos.

And there you have it!
Your Facebook Business page is up and prepared to provide awesome material to your fans and turn into something terrific.
Such articles How To Make Facebook Business Page from my thank you for visiting hope can help you.